
Virtual environments in python are very useful for managing different projects and especially when multiple people have to work on them. It is also useful for using packages which are not entirely supported on every version of python. Personally I needed a virtual environment when using Tensorflow. Tensorflow was not available on Python version 3.6 and hence I needed a different version of Python. Completely downgrading my python version is not ideal, so a virtual environment with Python 3.5 was the best solution. This blog will show you how to use these virtual environments in Pycharm, when having Pycharm and Anaconda installed. After this blog you will be able to apply the environments in both settings, when managing different projects and when you need a different version of python for certain packages. Hence you will be able to work more efficiently when working in projects together with other people.
Setting up a new environment
Starting with your first virtual environment you will need to start Pycharm and open the project, in which you want to use this new version of Python. Then in File>Settings you can go to project and the project interpreter.
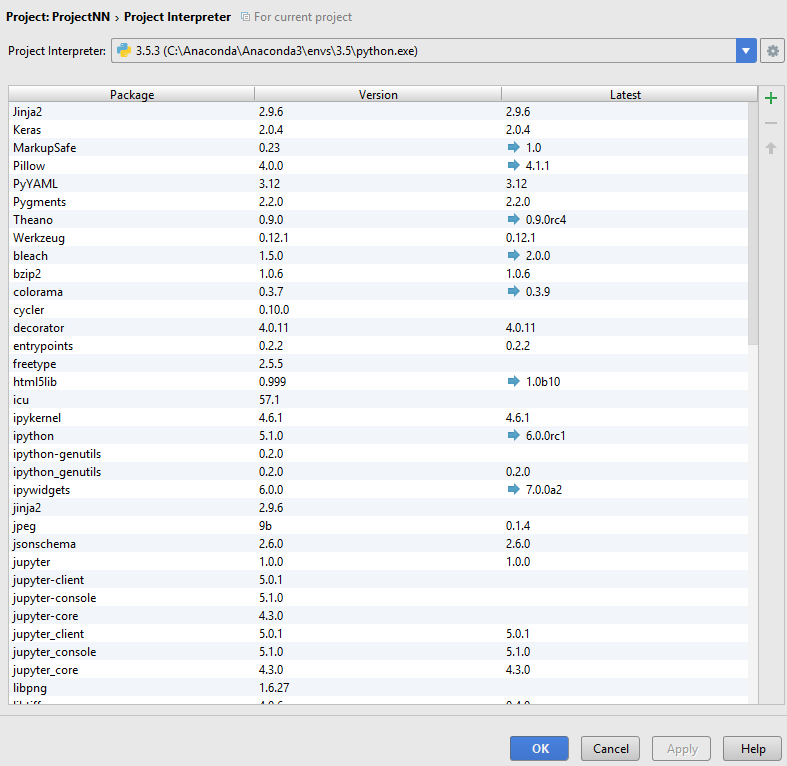
Here you can see the version of python you currently have installed and all the different packages used in this environment. You can create the new virtual environment in the upper right corner, where you press “create Conda Env”.
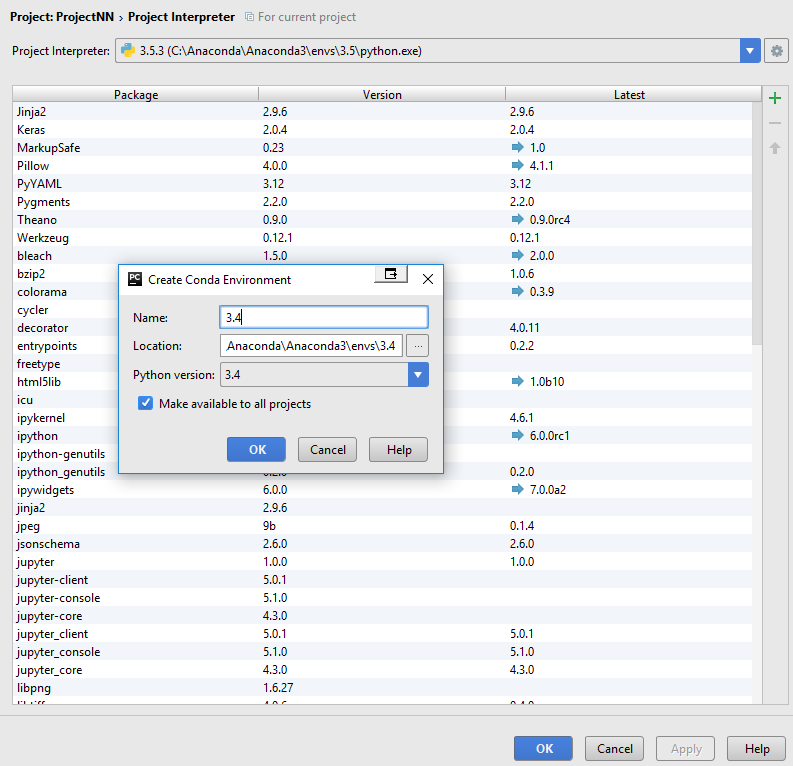
In here you can select the specific python version you want to use and you can give this new environment a name. If you want to use this environment for other projects as well, you have to check off the make available to all projects button. It is probably useful to put all your different environments into one folder, such that you can easily find it in your explorer. Then press ok and Pycharm will create a new virtual environment with your specified version of Python. After Pycharm is done creating the virtual environment, you want to look again at your project interpreter, select your new virtual environment and look at the different packages installed. Probably you only have a few packages installed and do not have all of your old packages in it. Hence you need to install the packages you want again. Installing these packages cannot be done the same way you would do it normally, we will explain this in the following section.
Installing the packages you want
Normally you would install packages in your command prompt with “pip install package” or “conda install package”. When you want new packages in your newly created environment this is not possible, because it would install the packages in your default location, or in other words initial version of python.
The way you now have to install new packages is as follows. For packages which need pip, you first need to find your environment’s pip.exe file. This can be found by going to your environment’s directory\Scripts if you look there you will find the pip.exe file you need. Then to install new packages, you need to go to your command prompt, copy the whole path and put \pip.exe behind it, for example: “C:\Anaconda\envs\3.5\Scripts\pip.exe”. After the path you just put “install package”, and you are done!

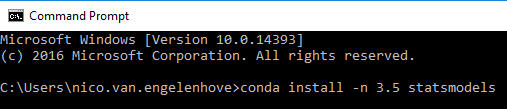
For the “conda install” packages it is a little bit easier. In your command prompt you write “conda install –n (name Environment) package”, which is quite similar to what you would normally do.
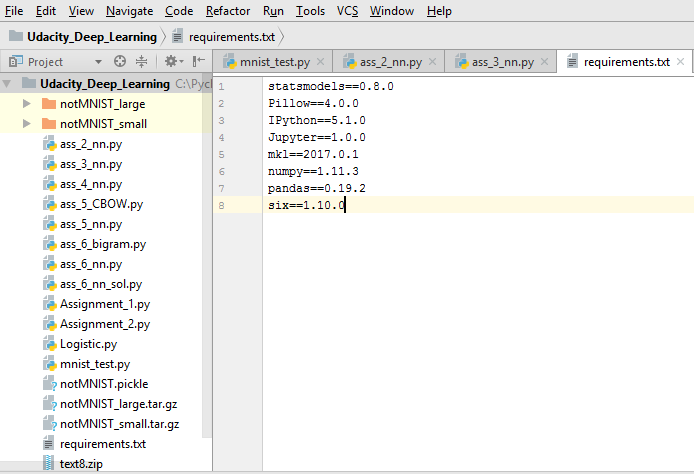
With these two manners of installing packages you can in principle install all packages you want, but this is slow and you have to do everything manually. A faster way of doing this is by setting up a requirements.txt file in your project. In this text file you can specify all the different packages that you want and the specifics of the version of that package. The packages need to be entered in the following way in the text file: package==version ,with an enter in between each package. A short example is given below.
This way Pycharm will notify you if these packages are not installed and will ask to install them for you. It could be the case that Pycharm is not able to install some packages. This is due to Pycharm only using pip instead of also using conda. Hence not all packages can be installed and you still have to install some of the packages manually with conda, but at least some packages are installed automatically.
The requirements.txt file is also very useful when having to work with somebody on the same project. This way both persons can easily create the exact same environment, which include identical packages. It is necessary, since other versions of a package can result in different results of the analysis done in python. This can be very cumbersome when for example having a data science project where you want pretty precise results.
One file solution
Another useful one line command is that of "conda env create". With this command you can actually create an environment with one file and install all required packages. You have to start by creating a environment.yml file first. This can be done in a text converter like sublime, in which you can save your file as a YAML file. An example of such a file is:
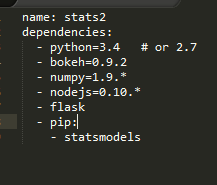
You can install packages which need to be installed with conda, but also with pip. The environment can then be created by entering the following line to your command prompt: "conda env create -f environment.yml", where environment is your file name. If this does not work, specify the whole path like:"conda env create -f C:\stats2\environment.yml". After creating the environment you still need to locate your new environment in Pycharm. In pycharm you again go to the project interpreter and go to the upper right corner, where you select "Add local". From here on out you select the path your environment is installed in. This is in your "envs" map, where your new environment has the name created in the environment file. The main advantage of this file is that everything is done automatically, where with the other approach you still have to install some packages manually. The problem with this approach is that it is not in Pycharm itself, but if you follow the previous instructions it is not that big of a problem. The environment.yml file is just as the requirements.txt file easily shareable with your colleagues and hence easy to use in shared projects.
Conclusion
Now you will be able to manage your own python environments and manage (combined) projects better with the requirements.txt file. Hopefully this blog was useful for getting to know the virtual environments of Python. If there are any questions or remarks, please add them below.


Leave a Reply
You must be logged in to post a comment.